
Docker for Web Development - Volumes
In the previous post we covered the basic concepts of Docker. In this post we'll dive into Docker Volumes and bind mounts — how the layered filesystem works, why data is lost when a container is deleted, and how named volumes and bind mounts let you persist and share data between containers.
Series — Docker for Web Development:
The layered filesystem of Docker images
Docker images are built using a layered filesystem. Each layer represents a set of changes to the image, such as adding files, installing packages, or modifying configurations. When you build an image, Docker creates a new layer for each instruction in your Dockerfile.
Images are read-only, and when you run a container from an image, Docker creates a new writable layer on top of the image layers. This allows you to make changes to the container without affecting the underlying image.
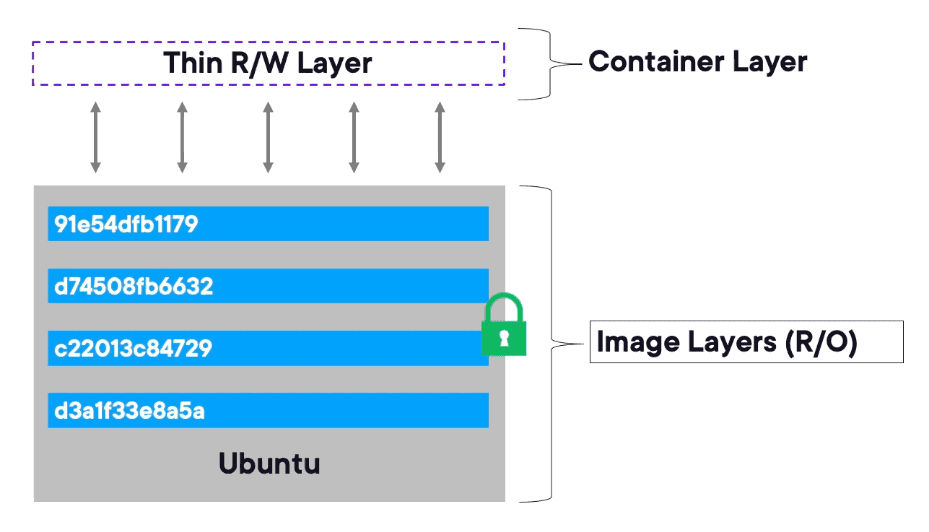
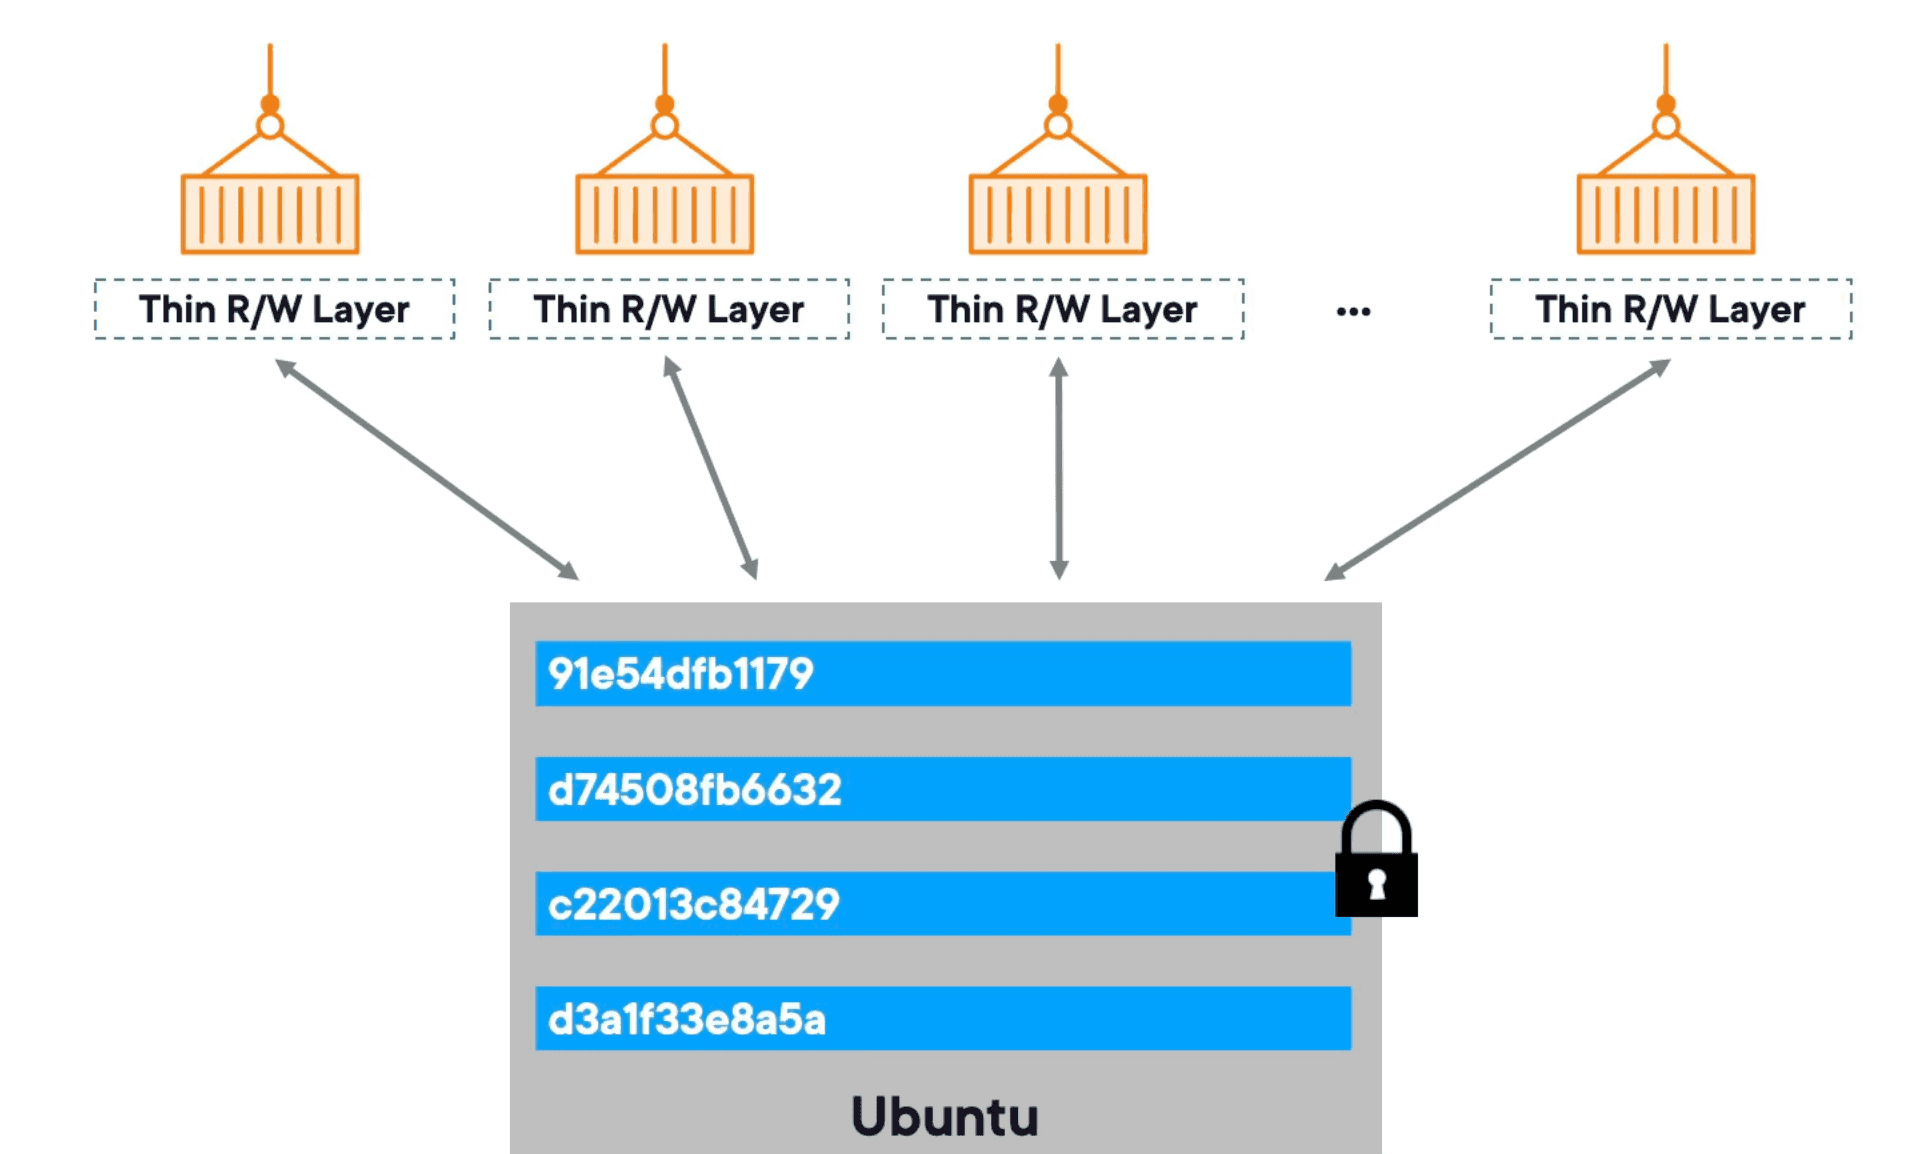
The writable layer is part of the container, not the image. An image can be deployed in multiple containers, and each container will have its own writable layer. This means that when you delete a container, all the changes made in that container are lost, but the underlying image remains intact and can be reused to create new containers.
For instance, if we run a database in that writable layer, all the data will be lost when the container is deleted. To persist data, we can use Docker Volumes, which we will cover in the next section.
Docker Volumes
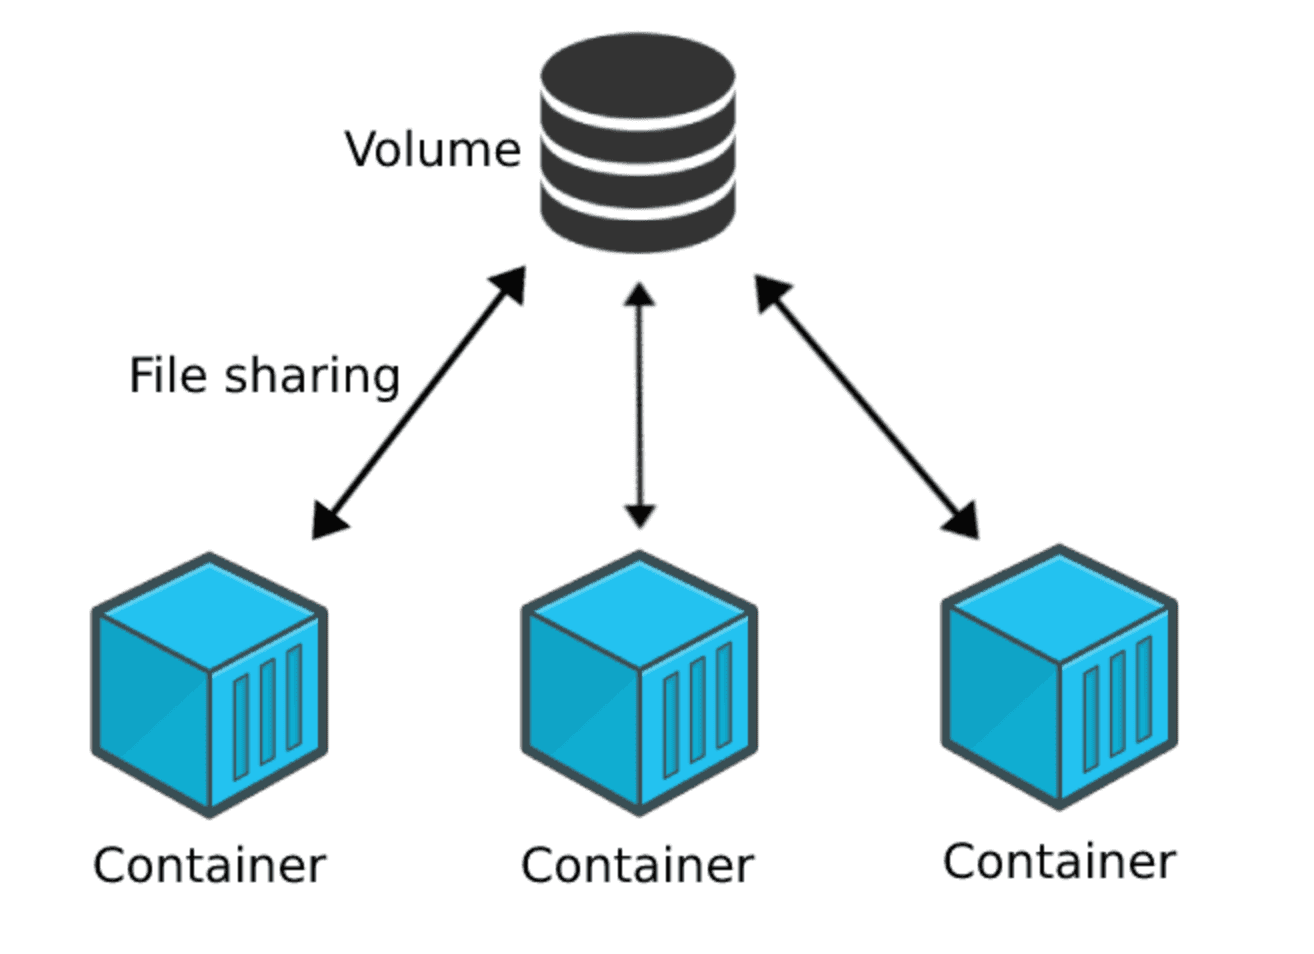
Docker Volumes are a powerful feature that allows you to persist data outside of the container's writable layer. Volumes are stored on the host machine and can be shared between multiple containers. This means that even if a container is deleted, the data in the volume will remain intact.
There are 2 main types of volumes in Docker:
- Named Volumes (Docker managed): These are managed by Docker and can be created using the
docker volume createcommand. Named volumes are stored in a specific location on the host machine and can be easily shared between containers.
docker volume create my_volumeOther than that, you can also create a named volume when running a container:
docker run -v my_volume:/path/in/container my_image- Bind Mounts (custom managed): These allow you to mount a specific directory from the host machine into a container. Bind mounts are useful for development purposes, as they allow you to make changes to files on the host machine and have those changes reflected in the container in real-time.
docker run -v /path/on/host:/path/in/container my_imageEvery time you refer to the path in your container, it will point to the path on your volume or bind mount. This allows you to persist data and share it between containers, ensuring that your data is not lost when a container is deleted.
Useful Commands
- Create a new named volume.
docker volume create my_volumedocker run -v my_volume:/path/in/container my_image- List all volumes on the host machine.
docker volume ls- Inspect a specific volume to see its details.
docker volume inspect my_volume- Remove a specific volume.
docker volume rm my_volume- Remove all unused volumes (volumes not referenced by any containers).
docker volume prunedocker system prune --volumes