Kubernetes for Developers - ConfigMaps and Secrets
In this post, we will explore Kubernetes ConfigMaps and Secrets, which are essential for managing configuration data and sensitive information for applications running in a Kubernetes cluster. You'll see how to create them from YAML, files, env files and the command line, and how to consume them as environment variables or mounted volumes inside your Pods.
Series — Kubernetes for Developers:
What are ConfigMaps and Secrets?
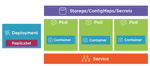
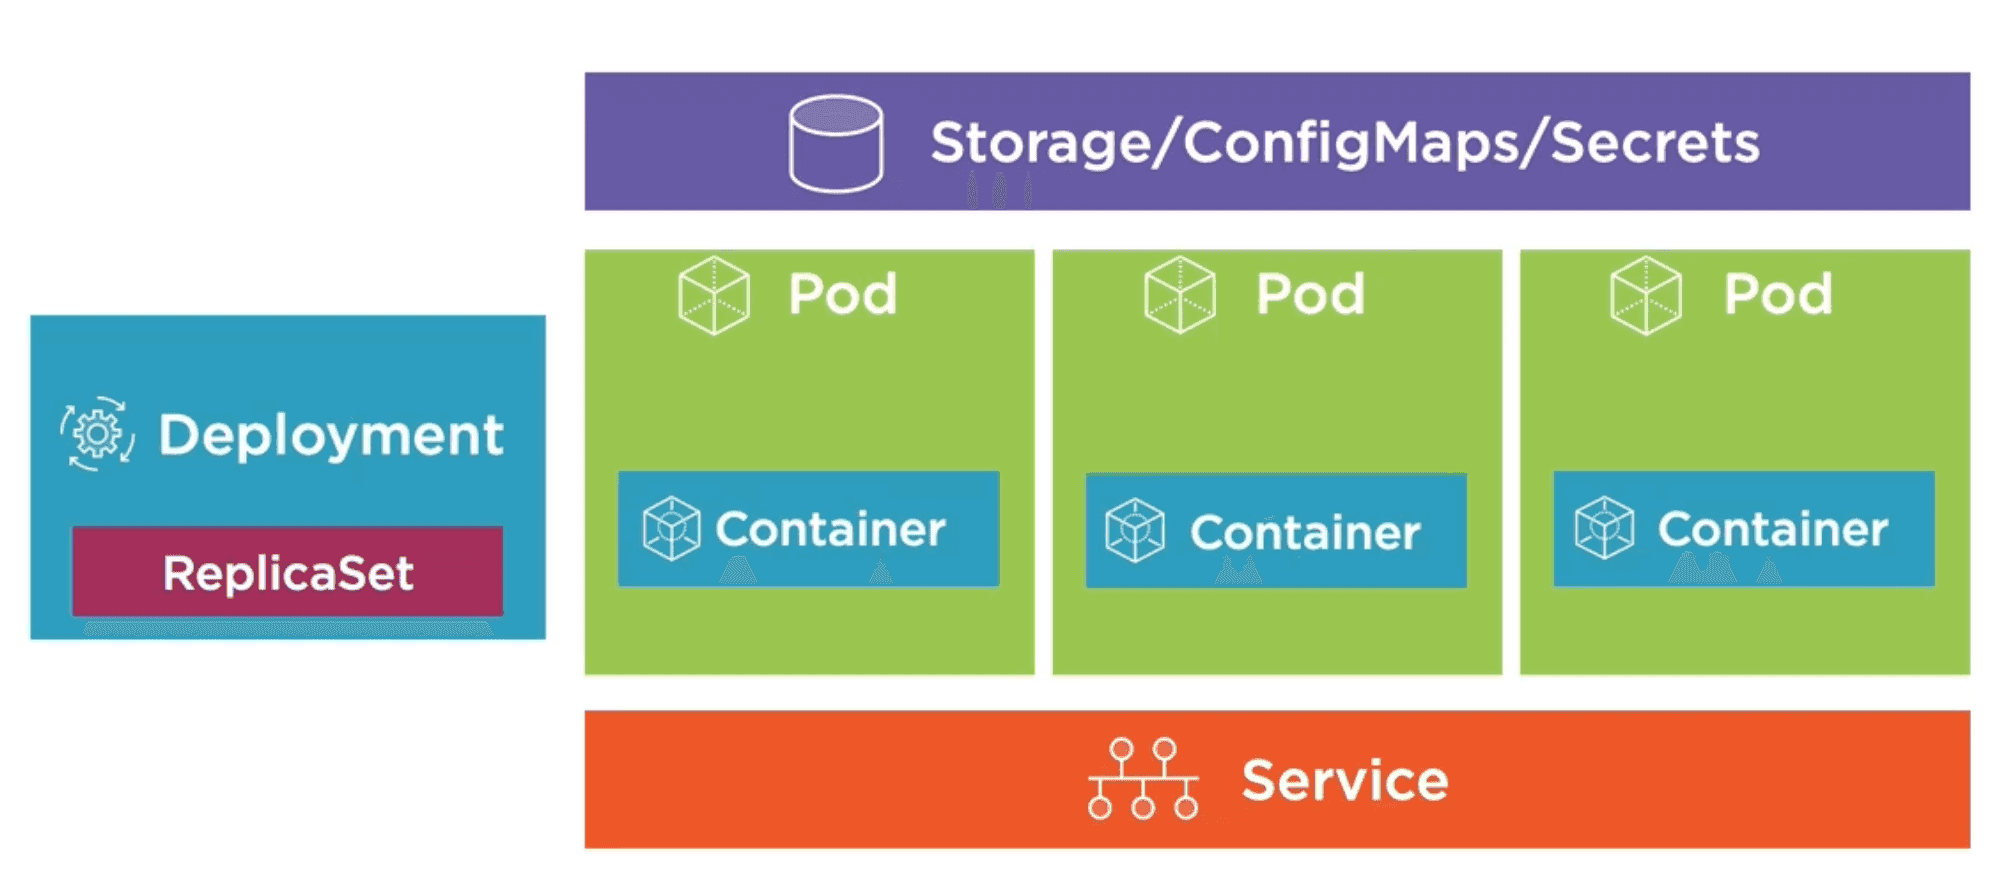
In Kubernetes, ConfigMaps and Secrets are two types of resources that allow you to manage configuration data and sensitive information separately from your application code. This separation of concerns helps in maintaining a clean architecture and allows for easier updates and management of configuration data without the need to rebuild or redeploy your application.
ConfigMaps
ConfigMaps are used to store non-sensitive configuration data in key-value pairs. They can be used to configure application settings, environment variables, command-line arguments, and more. Every POD in the cluster can access the ConfigMap data, making it easy to share configuration across multiple instances of an application.
Creating a ConfigMap
ConfigMaps can be stored in a file (JSON, XML, etc.), created using the kubectl create configmap command, or defined directly in a YAML manifest.
Then the ConfigMap can be mounted as a volume or injected as environment variables into the container.
Creating a ConfigMap from a YAML file
One way to create a ConfigMap is by defining it in a YAML file. Here's an example of a ConfigMap definition:
apiVersion: v1
kind: ConfigMap
metadata:
  name: my-settings
  labels:
    app: my-app-settings
data:
  environmentName: "test"
  database_url: "postgres://user:password@hostname:5432/dbname"
  maxBooksInCart: "10"
To get this ConfigMap into your cluster, you can use the following commands:
# create will throw an error if the ConfigMap already exists
kubectl create -f configmap.yaml
# apply will create the ConfigMap if it doesn't exist or update it if it does
kubectl apply -f configmap.yaml
Using a file to create a ConfigMap
It is possible to create a ConfigMap from a file. For example, we can set configuration file named app-config.json:
{
  "environmentName": "test",
  "database_url": "postgres://user:password@hostname:5432/dbname",
  "maxBooksInCart": 10
}
And then create a ConfigMap from this file using the following command:
# Note the use of the --from-file flag to create a ConfigMap from a file
kubectl create configmap my-settings --from-file=app-config.json
This will create a ConfigMap named my-settings with the contents of the app-config.json file, where the key will be the filename (app-config.json) and the value will be the file's content.
apiVersion: v1
kind: ConfigMap
metadata:
  name: my-settings
data:
  app-config.json: |
    {
      "environmentName": "test",
      "database_url": "postgres://user:password@hostname:5432/dbname",
      "maxBooksInCart": 10
    }
Using and env file to create a ConfigMap
You can also create a ConfigMap from an environment file. For example, if you have a file named app-config.env with the following content:
ENVIRONMENT_NAME=test
DATABASE_URL=postgres://user:password@hostname:5432/dbname
MAX_BOOKS_IN_CART=10
Now you can create a ConfigMap from this env file using the following command:
# Note the use of the --from-env-file flag to create a ConfigMap from an env file
kubectl create configmap my-settings --from-env-file=app-config.env
In this case the resulting ConfigMap will not have the env file as a key, but instead will have each line of the env file as a key-value pair in the ConfigMap. The resulting ConfigMap will look like this:
apiVersion: v1
kind: ConfigMap
metadata:
  name: my-settings
data:
  ENVIRONMENT_NAME: "test"
  DATABASE_URL: "postgres://user:password@hostname:5432/dbname"
  MAX_BOOKS_IN_CART: "10"
From the command line
You can also create a ConfigMap directly from the command line using the kubectl create configmap command with the --from-literal flag. For example:
# Note the use of the --from-literal flag to create a ConfigMap from command line arguments
kubectl create configmap my-settings \
  --from-literal=ENVIRONMENT_NAME=test \
  --from-literal=DATABASE_URL=postgres://user:password@hostname:5432/dbname \
  --from-literal=MAX_BOOKS_IN_CART=10
Using ConfigMaps in Pods
Once you have created a ConfigMap, you can use it in your Pods in two main ways: by mounting it as a volume or by injecting it as environment variables.
Injecting ConfigMap as Environment Variables
To inject the ConfigMap as environment variables, you can define the env section in your Pod's YAML manifest like this:
apiVersion: v1
kind: Pod
metadata:
  name: my-app-pod
spec:
  containers:
    - name: my-app-container
      image: my-app-image
      env:
        - name: ENVIRONMENT_NAME
          valueFrom:
            configMapKeyRef:
              name: my-settings # The name of the ConfigMap
              key: ENVIRONMENT_NAME # The key in the ConfigMap to use as the value
        - name: DATABASE_URL
          valueFrom:
            configMapKeyRef:
              name: my-settings # The name of the ConfigMap
              key: DATABASE_URL # The key in the ConfigMap to use as the value
        - name: MAX_BOOKS_IN_CART
          valueFrom:
            configMapKeyRef:
              name: my-settings # The name of the ConfigMap
              key: MAX_BOOKS_IN_CART # The key in the ConfigMap to use as the value
To load them all at once, you can use the envFrom field:
apiVersion: v1
kind: Pod
metadata:
  name: my-app-pod
spec:
  containers:
    - name: my-app-container
      image: my-app-image
      envFrom:
        - configMapRef:
            name: my-settings # The name of the ConfigMap
Mounting ConfigMap as a Volume
To mount the ConfigMap as a volume, you can define the volumes section in your Pod's YAML manifest and specify the ConfigMap as the source. Then, you can mount that volume into your container at a specific path. Here's an example:
apiVersion: v1
kind: Pod
metadata:
  name: my-app-pod
spec:
  containers:
    - name: my-app-container
      image: my-app-image
      volumeMounts:
        - name: config-volume
          mountPath: /etc/config # The path inside the container where the ConfigMap will be mounted
  volumes:
    - name: config-volume
      configMap:
        name: my-settings # The name of the ConfigMap
This will mount the ConfigMap as a volume at /etc/config inside the container, and each key in the ConfigMap will be represented as a file in that directory, with the file's content being the value of the key. For example, if the ConfigMap has a key database_url, there will be a file /etc/config/database_url containing the value of that key.
One of the benefits of this approach is that if the ConfigMap is updated, the changes will be reflected in the mounted volume without needing to restart the Pod. This means having live configuration updates. However, keep in mind that the application running inside the container may need to be designed to detect changes in the configuration files and use them as needed.
Secrets
Secrets are similar to ConfigMaps, but they are specifically designed to store sensitive information, such as passwords, API keys, and tokens. Secrets are stored in an encoded format (Base64) to provide a basic level of security, but they are not encrypted by default. It is important to use additional security measures, such as enabling encryption at rest for Secrets in your Kubernetes cluster.
So Kubernetes provides a secret store for sensitive information (passwords, API keys, tokens, certificates, etc.), so it avoids storing sensitive information in the application code or configuration files.
Then we can mount the secret as a volume or inject it as environment variables into the container, similar to how we use ConfigMaps.
Kubernetes only provide Secrets to Nodes that have a POD that requests a secret. So if a POD is deleted, the secret will be deleted from the Node as well. This is a security feature that prevents secrets from being leaked to other PODs that do not need them.
Secrets are stored in tmpfs on the Node, which is a temporary file system that lives in memory. This means that secrets are not written to disk, which provides an additional layer of security.
Finally, Secrets are not encrypted by default, but they can be encrypted at rest using a Kubernetes feature called "Encryption at Rest". This feature allows you to encrypt secrets using a key management system (KMS) or a cloud provider's encryption service.
Best practices to use with Secrets
When using Secrets in Kubernetes, it is important to follow best practices to ensure the security of sensitive information. Here are some best practices to consider:
- Use Secrets for sensitive information only, and use ConfigMaps for non-sensitive configuration data.
- Enable encryption at rest for Secrets in your Kubernetes cluster to protect sensitive information.
- Limit access to etcd to only those who need it (e.g. only administrators).
- Use Role-Based Access Control (RBAC) to restrict access to Secrets and ConfigMaps to only the necessary users and services.
- Use SSL/TLS for etcd communication to protect data in transit.
Creating a Secret
Secrets can be created using a YAML manifest, the kubectl create secret command, or by using the kubectl create secret generic command with the --from-literal or --from-file flags.
Creating a Secret from using the command line
You can create a Secret directly from the command line using the kubectl create secret command. For example, to create a Secret named my-secret with a username and password, you can use the following command:
# Note the use of the --from-literal flag to create a Secret from command line arguments
kubectl create secret generic my-secret \
  --from-literal=username=myuser \
  --from-literal=password=mypassword
# Also you can create a Secret from a file using the --from-file flag
kubectl create secret generic my-secret \
  --from-file=ssh-privatekey=~/.ssh/id_rsa \
  --from-file=ssh-publickey=~/.ssh/id_rsa.pub
If we are working with TLS certificates, we can create a Secret from a certificate file and a key file using the following command:
kubectl create secret tls my-tls-secret \
  --cert=path/to/tls.crt \
  --key=path/to/tls.key
Creating a Secret from a YAML file
It is possible to create a Secret from a YAML file, however, the data in the Secret is only base64 encoded, so if the YAML file is in the source control or somewhere where it can be accessed, the secret will be compromised. So it is not recommended to create Secrets from YAML files unless we are very sure the YAML file is very secure and not easily accessible.
apiVersion: v1
kind: Secret
metadata:
  name: my-secret
type: Opaque # The type of the secret, can be Opaque, kubernetes.io/service-account-token, kubernetes.io/dockercfg, kubernetes.io/dockerconfigjson, kubernetes.io/basic-auth, kubernetes.io/ssh-auth, kubernetes.io/tls
data:
  username: bXl1c2Vy # base64 encoded value of "myuser"
  password: bXlwYXNzd29yZA== # base64 encoded value of "mypassword"
Then we can create the Secret using the following command:
kubectl create -f secret.yaml
# or
kubectl apply -f secret.yaml
Using Secrets in Pods
Once you have created a Secret, you can use it in your Pods in two main ways:
Injecting Secrets as Environment Variables
To inject the Secret as environment variables, you can define the env section in your Pod's YAML manifest like this:
apiVersion: v1
kind: Pod
metadata:
  name: my-app-pod
spec:
  containers:
    - name: my-app-container
      image: my-app-image
      env:
        - name: USERNAME
          valueFrom:
            secretKeyRef:
              name: my-secret # The name of the Secret
              key: username # The key in the Secret to use as the value
        - name: PASSWORD
          valueFrom:
            secretKeyRef:
              name: my-secret # The name of the Secret
              key: password # The key in the Secret to use as the value
Mounting Secrets as a Volume
To mount the Secret as a volume, you can define the volumes section in your Pod's YAML manifest and specify the Secret as the source. Then, you can mount that volume into your container at a specific path. Here's an example:
apiVersion: v1
kind: Pod
metadata:
  name: my-app-pod
spec:
  containers:
    - name: my-app-container
      image: my-app-image
      volumeMounts:
        - name: secret-volume
          mountPath: /etc/secret # The path inside the container where the Secret will be mounted
          readOnly: true # It is a good practice to mount secrets as read-only
  volumes:
    - name: secret-volume
      secret:
        secretName: my-secret # The name of the Secret
Same as in ConfigMaps, this will mount the Secret as a volume at /etc/secret inside the container, and each key in the Secret will be represented as a file in that directory, with the file's content being the value of the key.
Other useful commands to manage ConfigMaps and Secrets
# List all ConfigMaps in the current namespace
kubectl get configmaps
# List all Secrets in the current namespace
kubectl get secrets
# Describe a specific ConfigMap
kubectl describe configmap my-settings
# Describe a specific Secret
kubectl describe secret my-secret
# Delete a specific ConfigMap
kubectl delete configmap my-settings
# Delete a specific Secret
kubectl delete secret my-secret