
Kubernetes for Developers - Create and Manage Pods
In this post, we will explore how to create and manage Pods in Kubernetes — the smallest deployable units in a Kubernetes cluster. You'll learn how to create Pods with both the imperative (kubectl run) and declarative (YAML) approaches, expose them with port-forwarding, inspect their logs, and configure liveness and readiness probes.
Series — Kubernetes for Developers:
What is a Pod in Kubernetes?
A pod is the smallest and simplest unit in the Kubernetes object model that can be created, deployed, and managed. It represents a single instance of a running process in your cluster. Pods can contain one or more containers, which share the same network namespace.
Pods serve the environment for the containers, and they organize the different parts of an application (server, database, caching, etc.).
Pods have IP, memory, volumes, and other resources that are shared among the containers in the pod. They can scale horizontally by creating multiple replicas of the same pod, and they are ephemeral: when a pod dies it is not revived — Kubernetes creates a new one in its place.
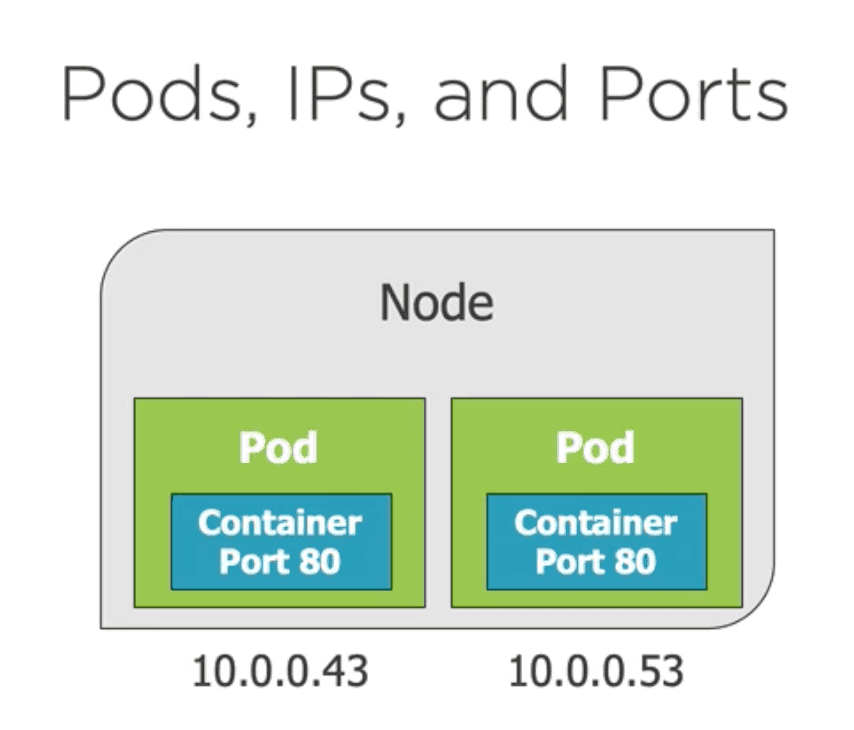
Each pod has a unique IP address, and all containers in a pod share the same network namespace, which means they can communicate with each other using localhost, and the containers need to bind to different ports within a container to avoid conflicts.
Creating a Pod
Using the Imperative Approach
We can create a pod in multiple ways. The imperative way is to use the kubectl run command, which creates a pod with a single container. For example, to create a pod named my-pod running the node:alpine image, you can use the following command:
kubectl run my-pod --image=node:alpineNow we can check the running pods using the following command:
kubectl get podsBy default, the pods are not accessible from outside the cluster. To access the pod, we can use the kubectl port-forward command to forward a local port to a port on the pod. For example, to forward local port 8080 (external port) to port 3000 on the pod (internal port), you can use the following command:
kubectl port-forward my-pod 8080:3000Now the pod is accessible from your local machine at http://localhost:8080.
Now we can check the logs of the pod using the following command:
kubectl logs my-podOr delete the pod using the following command:
kubectl delete pod my-podUsing the Declarative Approach
In the declarative approach, we define the desired state of the pod in a YAML file and then apply it using kubectl apply. For example, create a file named my-pod.yaml with the following content:
apiVersion: v1
kind: Pod
metadata:
  name: my-pod
spec:
  containers:
  - name: my-container
    image: node:alpine
    ports:
    - containerPort: 3000
Now we can create the pod using the following command:
kubectl create -f my-pod.yamlWe can also do a dry run to see what will be created without actually creating it:
kubectl create -f my-pod.yaml --dry-run --validate=trueThe kubectl create command is used to create resources, however if the resource already exists, it will return an error. To create or update a resource, we can use the kubectl apply command:
kubectl apply -f my-pod.yamlIf we want to delete the pod, we can use the following command:
kubectl delete -f my-pod.yamlPod Health and Lifecycle
Kubernetes provides Probes to monitor the health and lifecycle of pods. A Probe is a diagnostic tool that checks the health of a container in a pod. There are two types of probes:
- Liveness Probes: These probes check if the application inside the pod is still running. If the liveness probe fails, Kubernetes will restart the pod. In simple words, it defines when should the pod be restarted.
- Readiness Probes: These probes check if the application inside the pod is ready to serve traffic. If the readiness probe fails, Kubernetes will stop sending traffic to the pod until it becomes ready again. In simple words, it defines when should the pod be considered ready to receive traffic.
If the pod is not healthy (something inside the container is not functioning correctly), Kubernetes will automatically restart it to ensure that the application remains available. We can set that policy with the restartPolicy field in the pod specification. The default value is Always, which means that Kubernetes will always restart the pod if it fails. Other possible values are OnFailure and Never.
Let's add a liveness and readiness probe to our pod definition. We can modify the my-pod.yaml file as follows:
apiVersion: v1
kind: Pod
metadata:
  name: my-pod
spec:
  containers:
  - name: my-container
    image: node:alpine
    ports:
    - containerPort: 3000
    # Add a liveness probe to check the health of the application
    livenessProbe:
      httpGet:
        # Check the /health endpoint of the application in port 3000
        path: /health
        port: 3000
      # Wait 5 seconds before starting the first probe
      initialDelaySeconds: 5
      # Check the health of the application every 10 seconds
      periodSeconds: 10
      # If the probe fails 2 times, consider the pod as unhealthy and restart it
      failureThreshold: 2
    # Add a readiness probe to check if the application is ready to serve traffic
    readinessProbe:
      httpGet:
        # Check the /ready endpoint of the application in port 3000
        path: /index.html
        port: 3000
      # Wait 5 seconds before starting the first probe
      initialDelaySeconds: 5
      # Check the readiness of the application every 10 seconds
      periodSeconds: 10